本文最后更新于:2022年1月13日 下午
实验四:设备管理和文件管理
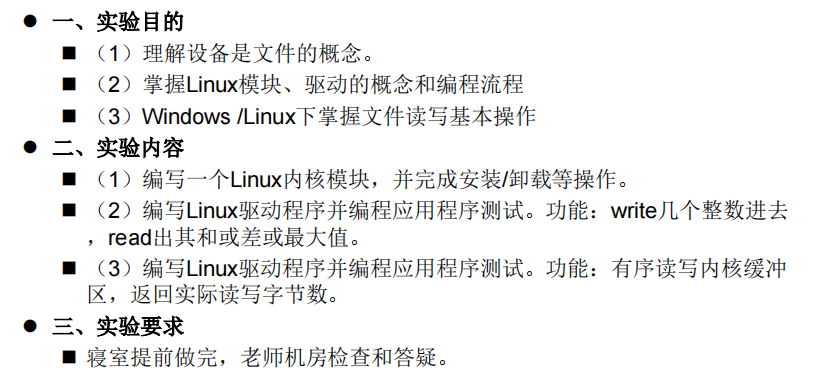
1.Linux内核模块编写、安装、卸载
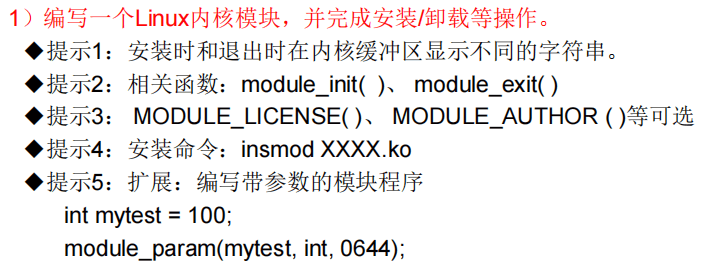
在用户态下编程,可以通过main()来传递命令行参数,同样,在编写内核模块时,可以通过module_param来实现向模块中传入参数。
| #define module_param(name, type, perm)
module_param_named(name, name, type, perm)
|
module_param使用了3个参数:变量名,变量类型,以及一个权限掩码来做一个辅助的sysfs入口。
变量类型支持:bool,invbool(与bool相反,为真对应false,为假对应true),charp(字符指针),int,long,short,uint,ulong,ushort。
module_param支持单个参数,如果参数为数组的话,可以使用:
| module_param_array(name,type,num,perm);
|
name为数组名(参数名),type为数组元素的类型,num为数组元素的个数,模块加载者拒绝比数组能放下的多的值,perm为权限值。
perm为一个权限值,表示此参数在sysfs文件系统中所对应的文件节点的属性。你应当使用 <linux/stat.h> 中定义的值. 这个值控制谁可以存取这些模块参数在 sysfs 中的表示.当perm为0时,表示此参数不存在 sysfs文件系统下对应的文件节点。 否则, 模块被加载后,在/sys/module/ 目录下将出现以此模块名命名的目录, 带有给定的权限.。权限在include/linux/stat.h中有定义。
1
2
3
4
5
6
7
8
9
10
11
12
13
14
15
16
17
| #include <linux/init.h>
#include <linux/module.h>
#include <linux/kernel.h>
MODULE_LICENSE("GPL");
MODULE_AUTHOR("ziyikee");
static char *name;
module_param(name,charp,0644);
static int __init hello_init(void){
printk("Hello,%s\n",name);
return 0;
}
static void __exit hello_exit(void){
printk("Goodbye,%s\n",name);
}
module_init(hello_init);
module_exit(hello_exit);
|
| KERNEL_PATH := /lib/modules/$(shell uname -r)/build
PWD := $(shell pwd)
MODULE_NAME := module_pa
obj-m := $(MODULE_NAME).o
all:
$(MAKE) -C $(KERNEL_PATH) M=$(PWD)
clean:
rm -rf .*.cmd *.o *.mod.c *.order *.symvers *.tmp *.ko
|
| root@zykk-VMware:/usr/OS
make -C /lib/modules/5.10.1/build M=/usr/OS
make[1]: 进入目录“/usr/src/linux-5.10.1”
CC [M] /usr/OS/module_pa.o
MODPOST /usr/OS/Module.symvers
LD [M] /usr/OS/module_pa.ko
make[1]: 离开目录“/usr/src/linux-5.10.1”
|
- 使用命令
insmod 文件名.ko 参数名=参数值,加载模块:
- 使用命令
lsmod | grep 文件名,查看加载的模块:
| root@zykk-VMware:/usr/OS
module_pa 16384 0
|
- 使用命令
dmesg,查看日志文件中模块输出的内容:

- 使用命令
rmmod 文件名.ko,移除模块,移除后可使用lsmod再次查看是否移除成功
2. 编写Linux驱动程序并编程应用程序测试1
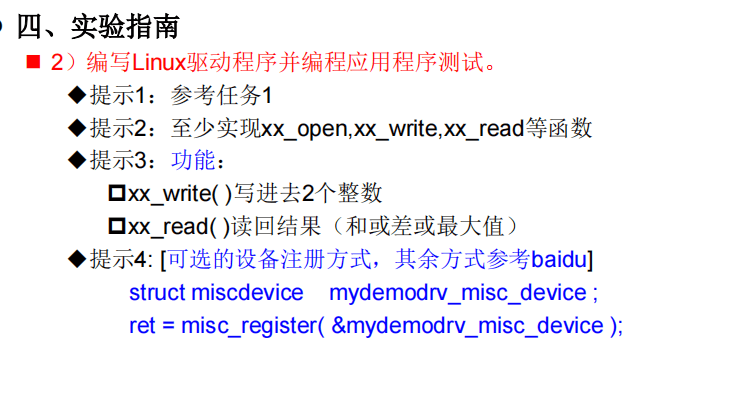
在写之前先看一下下面两个博客,一个给出了具体的实现和一些前置知识,另一个给出了用户态与内核态交换数据的函数及其原理。
写一个完整的Linux驱动程序访问硬件并写应用程序进行测试
Linux 字符设备驱动开发基础(三)
1
2
3
4
5
6
7
8
9
10
11
12
13
14
15
16
17
18
19
20
21
22
23
24
25
26
27
28
29
30
31
32
33
34
35
36
37
38
39
40
41
42
43
44
45
46
47
48
49
50
51
52
53
54
55
56
57
58
59
60
61
62
63
64
65
66
67
68
69
70
71
72
73
74
75
76
77
78
79
80
81
82
83
84
85
86
87
88
89
90
91
92
93
94
95
96
97
98
99
100
101
102
103
104
105
106
| #include <linux/kernel.h>
#include <linux/module.h>
#include <linux/cdev.h>
#include <linux/fs.h>
#include <asm/uaccess.h>
dev_t devno;
int major = 255;
const char DEVNAME[] = "hello_device";
int data[2];
int hello_open(struct inode * ip, struct file * fp)
{
printk("%s : %d\n", __func__, __LINE__);
return 0;
}
int hello_close(struct inode * ip, struct file * fp)
{
printk("%s : %d\n", __func__, __LINE__);
return 0;
}
ssize_t hello_read(struct file * fp,char __user * buf, size_t count, loff_t * loff)
{
int ret;
printk("%s : %d\n", __func__, __LINE__);
if ((ret = copy_to_user(buf, data, count)))
{
printk("copy_to_user err\n");
return -1;
}
printk("读出两个数:%d,%d,计算两数之和为:%d\n",data[0],data[1],data[0]+data[1]);
return count;
}
ssize_t hello_write(struct file * fp, const char __user * buf, size_t count, loff_t * loff)
{
int ret;
printk("%s : %d\n", __func__, __LINE__);
if ((ret = copy_from_user(data, buf, count)))
{
printk("copy_from_user err\n");
return -1;
}
printk("写入两个数:%d,%d\n",data[0],data[1]);
return count;
}
struct file_operations hello_fops = {
.owner = THIS_MODULE,
.open = hello_open,
.release = hello_close,
.read = hello_read,
.write = hello_write
};
struct cdev cdev;
static int hello_init(void)
{
int ret;
printk("%s : %d\n", __func__, __LINE__);
devno = MKDEV(major, 0);
ret = register_chrdev_region(devno, 1, DEVNAME);
if (ret != 0)
{
printk("%s : %d fail to register_chrdev_region\n", __func__, __LINE__);
return -1;
}
cdev.owner = THIS_MODULE;
ret = cdev_add(&cdev, devno, 1);
cdev_init(&cdev, &hello_fops);
if (ret < 0)
{
printk("%s : %d fail to cdev_add\n", __func__, __LINE__);
return -1;
}
printk("success!\n");
return 0;
}
static void hello_exit(void)
{
printk("%s : %d\n", __func__, __LINE__);
cdev_del(&cdev);
unregister_chrdev_region(devno, 1);
}
MODULE_LICENSE("GPL");
module_init(hello_init);
module_exit(hello_exit);
|
上述代码是我根据博客的进行了修改,只对两个整数进行操作,因此内核态只用了一个大小为2的int数组,注意:在内核态是不允许对用户态的数据进行操作的,比如hello_read函数中传进来的用户态指针buf,你不能在内核态的代码里去操作他,否则会出现BUG,程序会被kill调。如果严格按照要求来的话,只需要修改read中的代码,copy一个两数之和就可以。
1
2
3
4
5
6
7
8
9
10
11
12
13
14
15
16
17
18
19
20
21
22
23
24
25
26
27
28
29
30
31
32
33
34
35
36
37
38
39
40
41
42
43
| #include <unistd.h>
#include <sys/stat.h>
#include <sys/types.h>
#include <fcntl.h>
#include <stdio.h>
int main(char argc, char * argv[])
{
int fd;
int ret;
int buf[2] = {2,3};
int buf1[2] = {0,0};
if (argc != 2)
{
printf("Usage: %s <filename>\n", argv[0]);
return -1;
}
fd = open(argv[1], O_RDWR);
if (fd < 0)
{
perror("fail to open file\n");
return -1;
}
ret = write(fd, buf, sizeof(buf));
if (ret < 0)
{
printf("write err!\n");
return -1;
}
printf("读数据前,buf1:{%d,%d}\n",buf1[0],buf1[1]);
ret = read(fd,buf1,sizeof(buf1));
if(ret<0)
{
printf("read err!\n");
return -1;
}
printf("读数据后,buf1:{%d,%d}\n",buf1[0],buf1[1]);
close(fd);
return 0;
}
|
| //生成mymodule.ko
make
//安装驱动
insmod mymodule.ko
//查看是否安装成功
lsmod |grep mymodule 或者 cat /proc/devices 查看对应的设备号和名字
//创建设备节点和设备挂钩
mknod /dev/hello c 255 0
/*当我们执行insmod后驱动就被安装到了内核中,但是我们要想访问驱动,必须先创建设备节点,通过设备节点来访问驱动,设备节点其实就是个文件,文件类型是c–字符设备文件。
/dev/hello:要创建的设备节点的名字及路径,一般都在/dev目录下创建。
c: 表示要创建一个字符设备。
255 0:主设备号和次设备号,表示创建的这个设备节点和对应设备号是(255,0)的这个设备关联,这样访问这个设备节点就可以通过设备号唯一确定一个设备了。
*/
//编译测试程序,运行测试程序并将设备文件作为参数
gcc -o test2 test2.c
./test2 /dev/hello
|


3. 编写Linux驱动程序并编程应用程序测试2
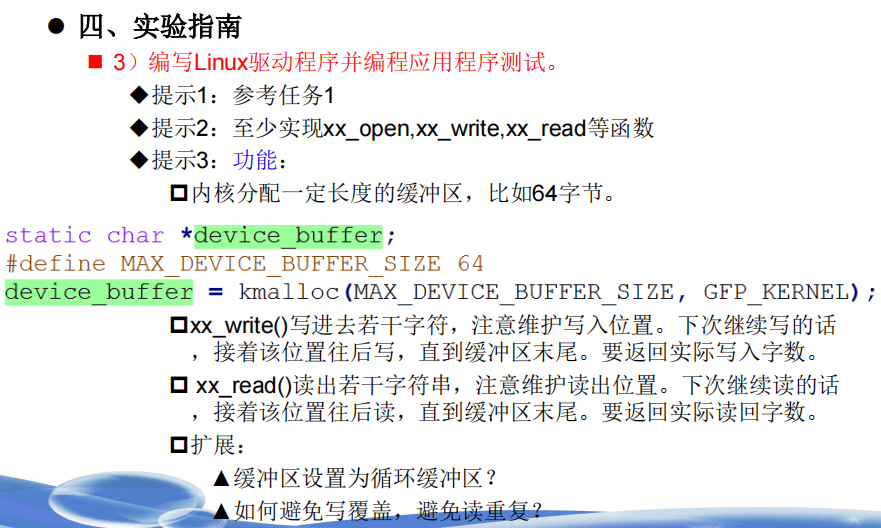
为了实现缓冲区读写,需要在驱动程序中申请一块缓冲区,同时需要记录当前缓冲区的存储内容的长度,并且在读写操作之后进行调整,新写入的内容放在就之前写过的内容之后,读数据时读出最后面的内容。
每次开始读数据或写数据前,都需要对当前缓冲区已有内容的长度和需要输入或读出的长度进行判断,保证只在规定的缓冲区长度内进行读写。
编写驱动程序mydev.c:
1
2
3
4
5
6
7
8
9
10
11
12
13
14
15
16
17
18
19
20
21
22
23
24
25
26
27
28
29
30
31
32
33
34
35
36
37
38
39
40
41
42
43
44
45
46
47
48
49
50
51
52
53
54
55
56
57
58
59
60
61
62
63
64
65
66
67
68
69
70
71
72
73
74
75
76
77
78
79
80
81
82
83
84
85
86
87
88
89
90
91
92
93
94
95
96
97
98
99
100
101
102
103
104
105
106
107
108
109
110
111
112
113
114
115
116
117
118
119
120
121
122
123
124
125
126
| #include <linux/kernel.h>
#include <linux/module.h>
#include <linux/cdev.h>
#include <linux/fs.h>
#include <linux/init.h>
#include <linux/uaccess.h>
#include <linux/miscdevice.h>
#include <linux/slab.h>
dev_t devno;
int major = 255;
const char DEVNAME[] = "mydev";
static char* buffer;
static size_t pos;
#define MAX_BUFFER_SIZE 64
static int mydev_open(struct inode * ip, struct file * fp)
{
printk("%s : %d\n", __func__, __LINE__);
buffer = kmalloc(MAX_BUFFER_SIZE,GFP_KERNEL);
pos = 0;
return 0;
}
static int mydev_close(struct inode * ip, struct file * fp)
{
printk("%s : %d\n", __func__, __LINE__);
kfree(buffer);
return 0;
}
ssize_t mydev_read(struct file * fp,char __user * buf, size_t count, loff_t * loff)
{
int ret;
if(pos==0){
printk("缓冲区为空\n");
return 0;
}
if(pos < count){
count = pos;
}
printk("%s : %d\n", __func__, __LINE__);
if ((ret = copy_to_user(buf, buffer+pos-count, count)))
{
printk("copy_to_user err\n");
return -1;
}
pos = pos -count;
printk("读取%ld字节,缓冲区剩余%ld字节\n",count,pos);
return count;
}
ssize_t mydev_write(struct file * fp, const char __user * buf, size_t count, loff_t * loff)
{
int ret;
size_t useful;
useful = count;
if(pos + count > 64){
if(pos>=64){
printk("缓冲区已满\n");
return 0;
}
useful = 64-pos;
}
printk("%s : %d\n", __func__, __LINE__);
if ((ret = copy_from_user(buffer+pos, buf, useful)))
{
printk("copy_from_user err\n");
return -1;
}
pos = pos+useful;
printk("写入%ld字节,剩余%ld字节未写,缓冲区现有%ld字节\n",useful,(count-useful),pos);
return useful;
}
struct file_operations mydev_fops = {
.owner = THIS_MODULE,
.open = mydev_open,
.release = mydev_close,
.read = mydev_read,
.write = mydev_write
};
struct cdev cdev;
static int mydev_init(void)
{
int ret;
printk("%s : %d\n", __func__, __LINE__);
devno = MKDEV(major, 0);
ret = register_chrdev_region(devno, 1, DEVNAME);
if (ret != 0)
{
printk("%s : %d fail to register_chrdev_region\n", __func__, __LINE__);
return -1;
}
cdev.owner = THIS_MODULE;
ret = cdev_add(&cdev, devno, 1);
cdev_init(&cdev, &mydev_fops);
if (ret < 0)
{
printk("%s : %d fail to cdev_add\n", __func__, __LINE__);
return -1;
}
printk("success!\n");
return 0;
}
static void mydev_exit(void)
{
printk("%s : %d\n", __func__, __LINE__);
cdev_del(&cdev);
unregister_chrdev_region(devno, 1);
}
MODULE_LICENSE("GPL");
module_init(mydev_init);
module_exit(mydev_exit);
|
这里的read函数其实有点问题,每次读数据时并不是从头开始读,而是从读字符数组后面开始读,比如缓冲区内容为12345,读两个字符的话,读的是45,而不是12,如果需要从头读的话,可以设置头尾两个指针,头指针读,尾指针写,做一些修改。
编写测试程序test3.c:
1
2
3
4
5
6
7
8
9
10
11
12
13
14
15
16
17
18
19
20
21
22
23
24
25
26
27
28
29
30
31
32
33
34
35
36
| #include <stdio.h>
#include <fcntl.h>
#include <unistd.h>
#include <string.h>
#define DEV_NAME "/dev/mydev"
int main()
{
char buffer[256];
int fd;
fd = open(DEV_NAME, O_RDWR | O_CREAT);
if (fd < 0) {
printf("open device %s failded\n", DEV_NAME);
return -1;
}
int op = 1;
size_t len;
while(op){
memset(buffer,'\0',sizeof(buffer));
printf("1.Read,2.Write,0.Exit\n");
printf("请输入你的选择:");
scanf("%d",&op);
if(op==2){
printf("请输入向缓冲区写的内容:");
scanf("%s",buffer);
write(fd,buffer,strlen(buffer));
}else if(op==1){
printf("请输入需要读取的缓冲区长度(输入0程序结束):");
scanf("%ld",&len);
read(fd, buffer, len);
printf("从缓冲区读:%s\n", buffer);
}
}
close(fd);
return 0;
}
|
之后编译安装驱动程序,编译运行测试程序进行检验即可:
1
2
3
4
5
6
7
8
9
10
11
12
13
14
15
16
17
18
| root@zykk-VMware:/usr/OS/task3
root@zykk-VMware:/usr/OS/task3
make -C /lib/modules/5.10.1/build M=/usr/OS/task3
make[1]: 进入目录“/usr/src/linux-5.10.1”
CC [M] /usr/OS/task3/mydev.o
MODPOST /usr/OS/task3/Module.symvers
CC [M] /usr/OS/task3/mydev.mod.o
LD [M] /usr/OS/task3/mydev.ko
make[1]: 离开目录“/usr/src/linux-5.10.1”
root@zykk-VMware:/usr/OS/task3
Makefile Module.symvers mydev.ko mydev.mod.c mydev.o
modules.order mydev.c mydev.mod mydev.mod.o test3.c
root@zykk-VMware:/usr/OS/task3
root@zykk-VMware:/usr/OS/task3
mydev 16384 0
root@zykk-VMware:/usr/OS/task3# mknod /dev/mydev c 257 0
root@zykk-VMware:/usr/OS/task3
|
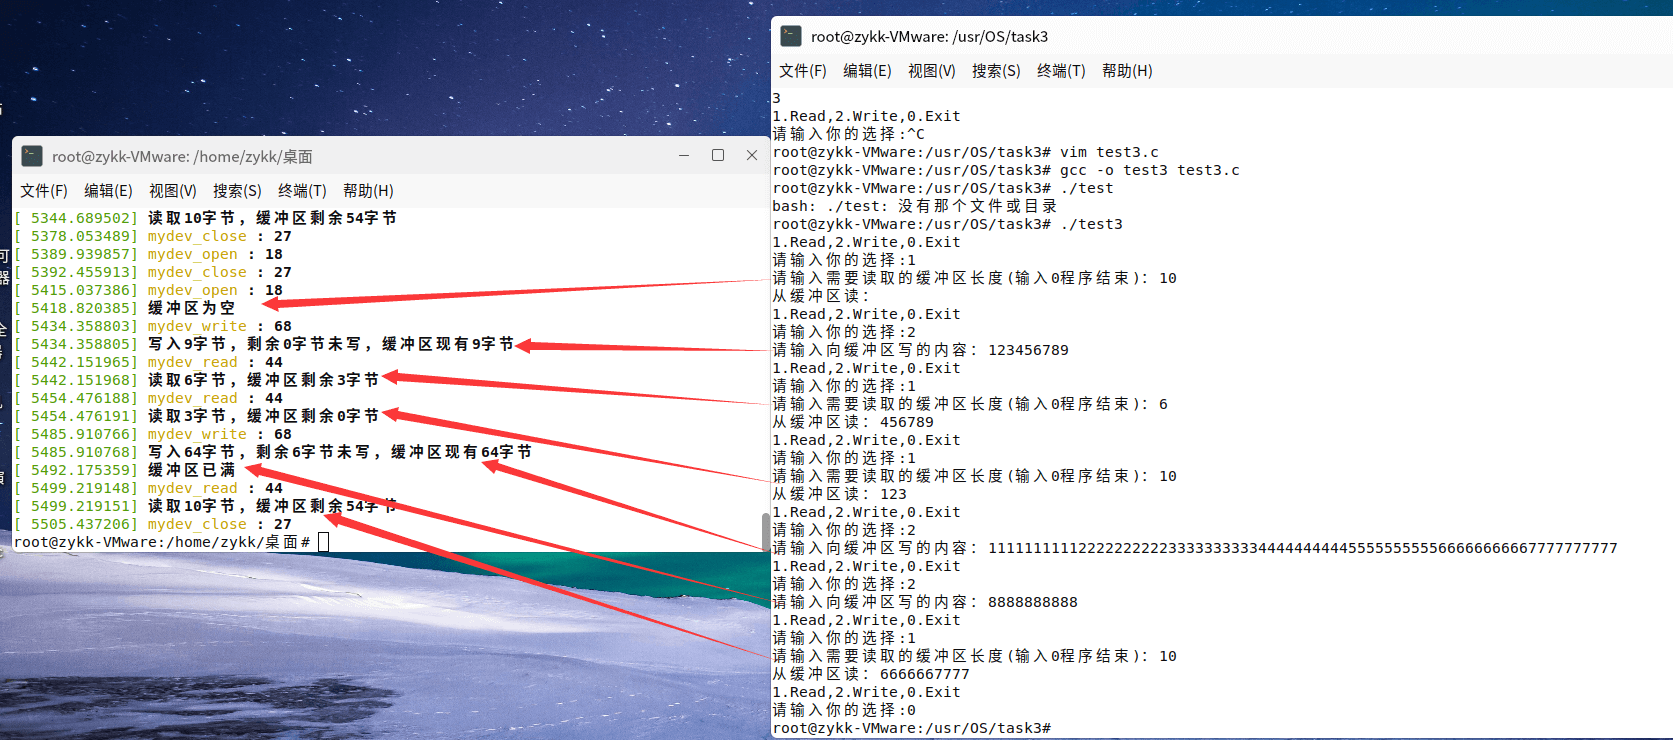
运行结果如下图,在运行测试程序的同时,使用dmesg命令查看日志信息的输出即可:
参考链接:


